how to tie a cross knot
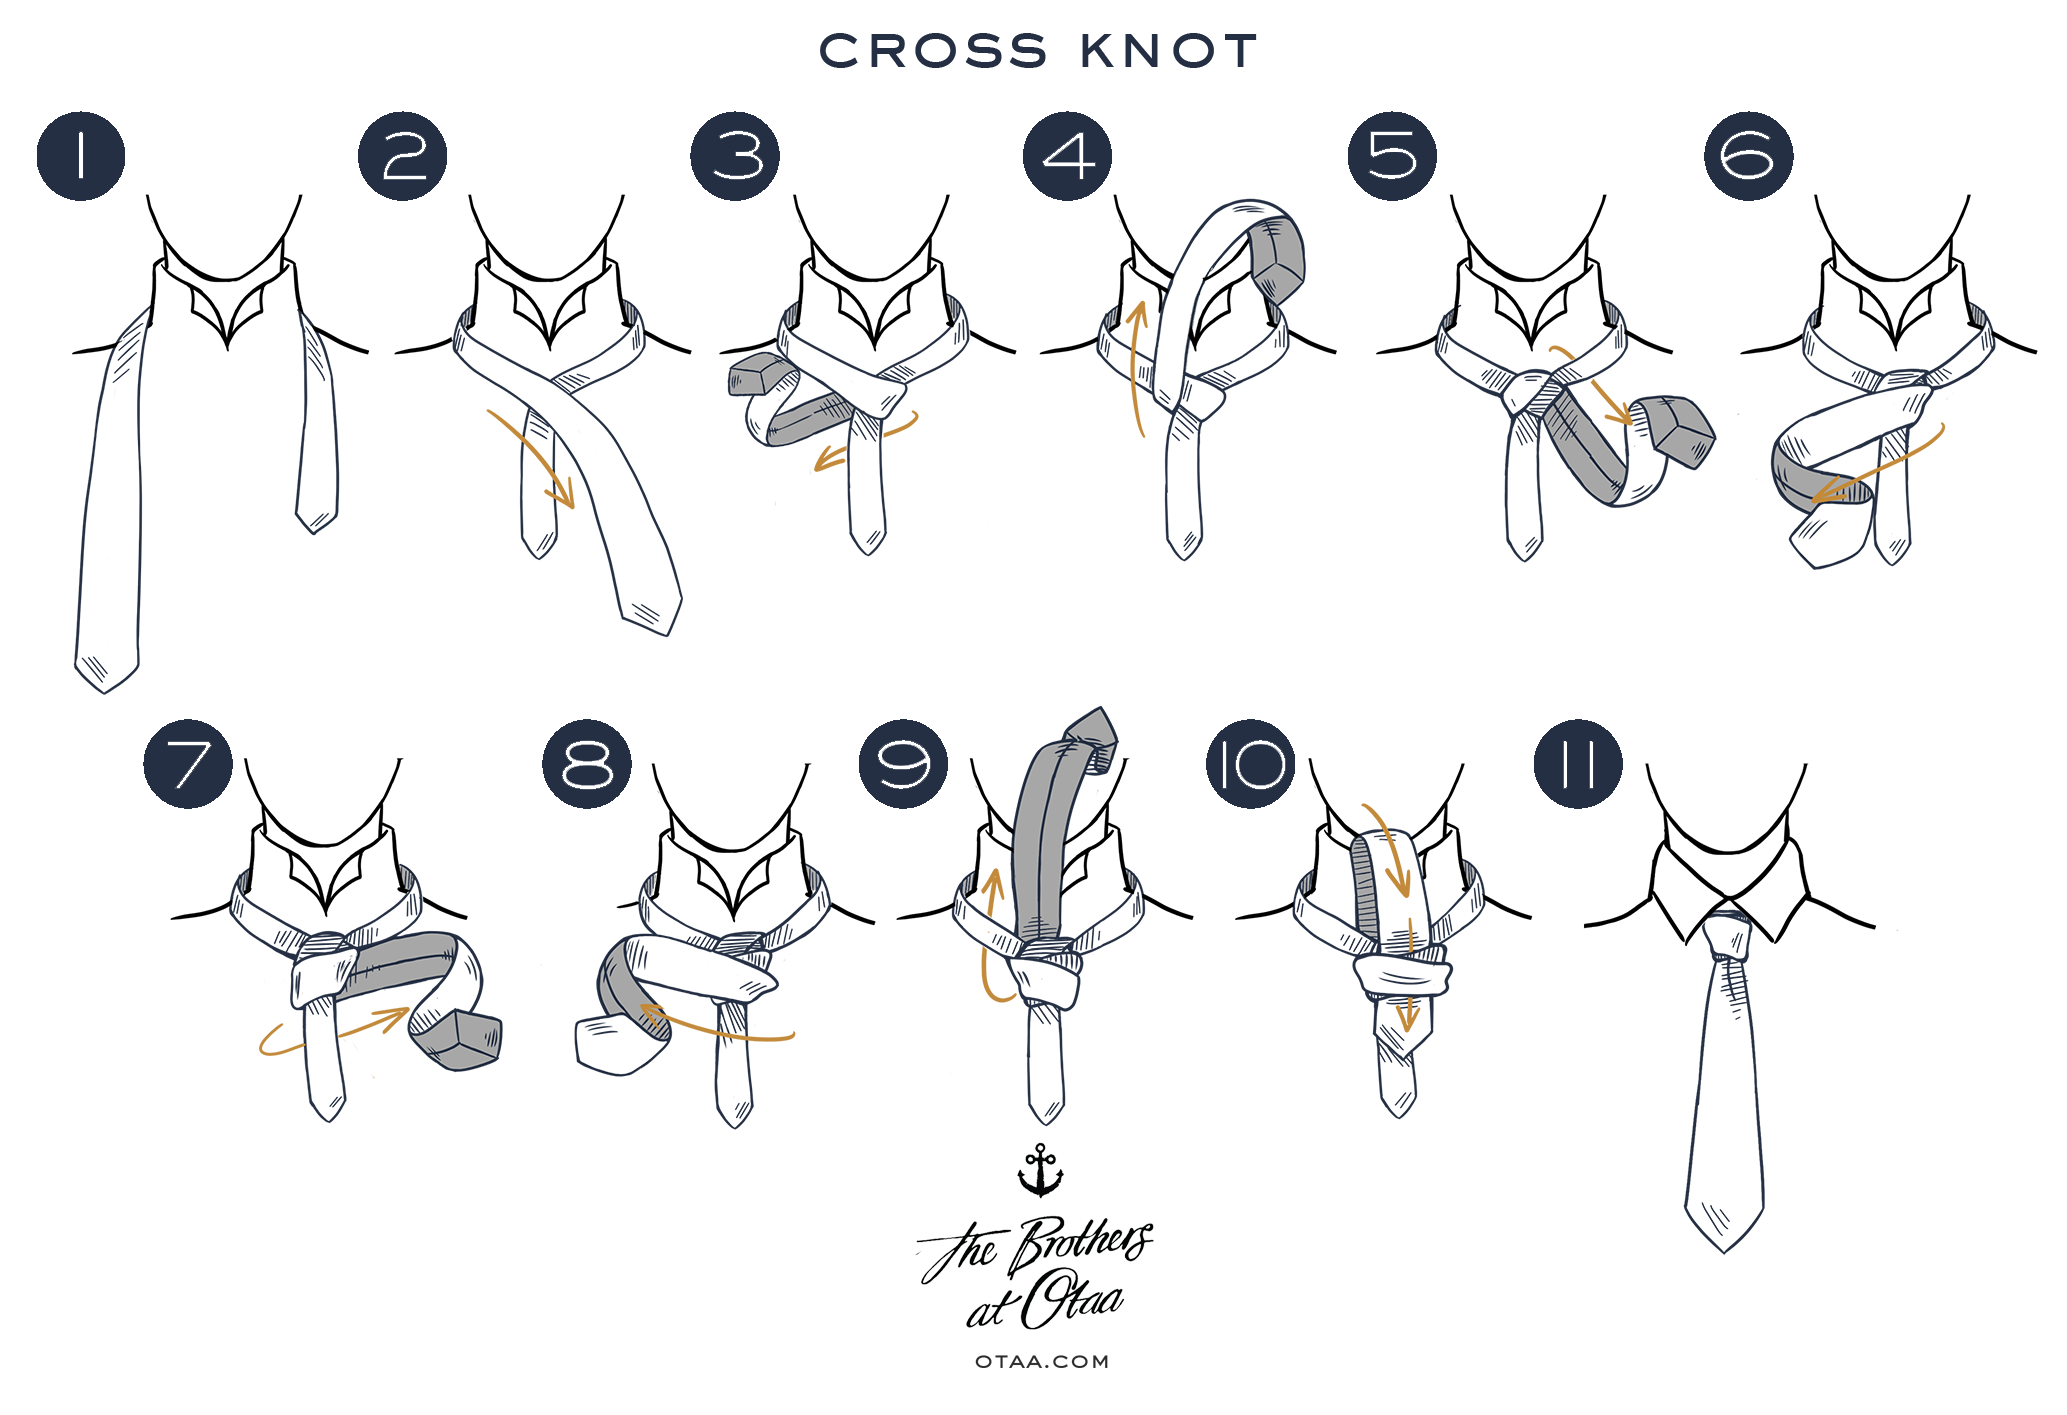
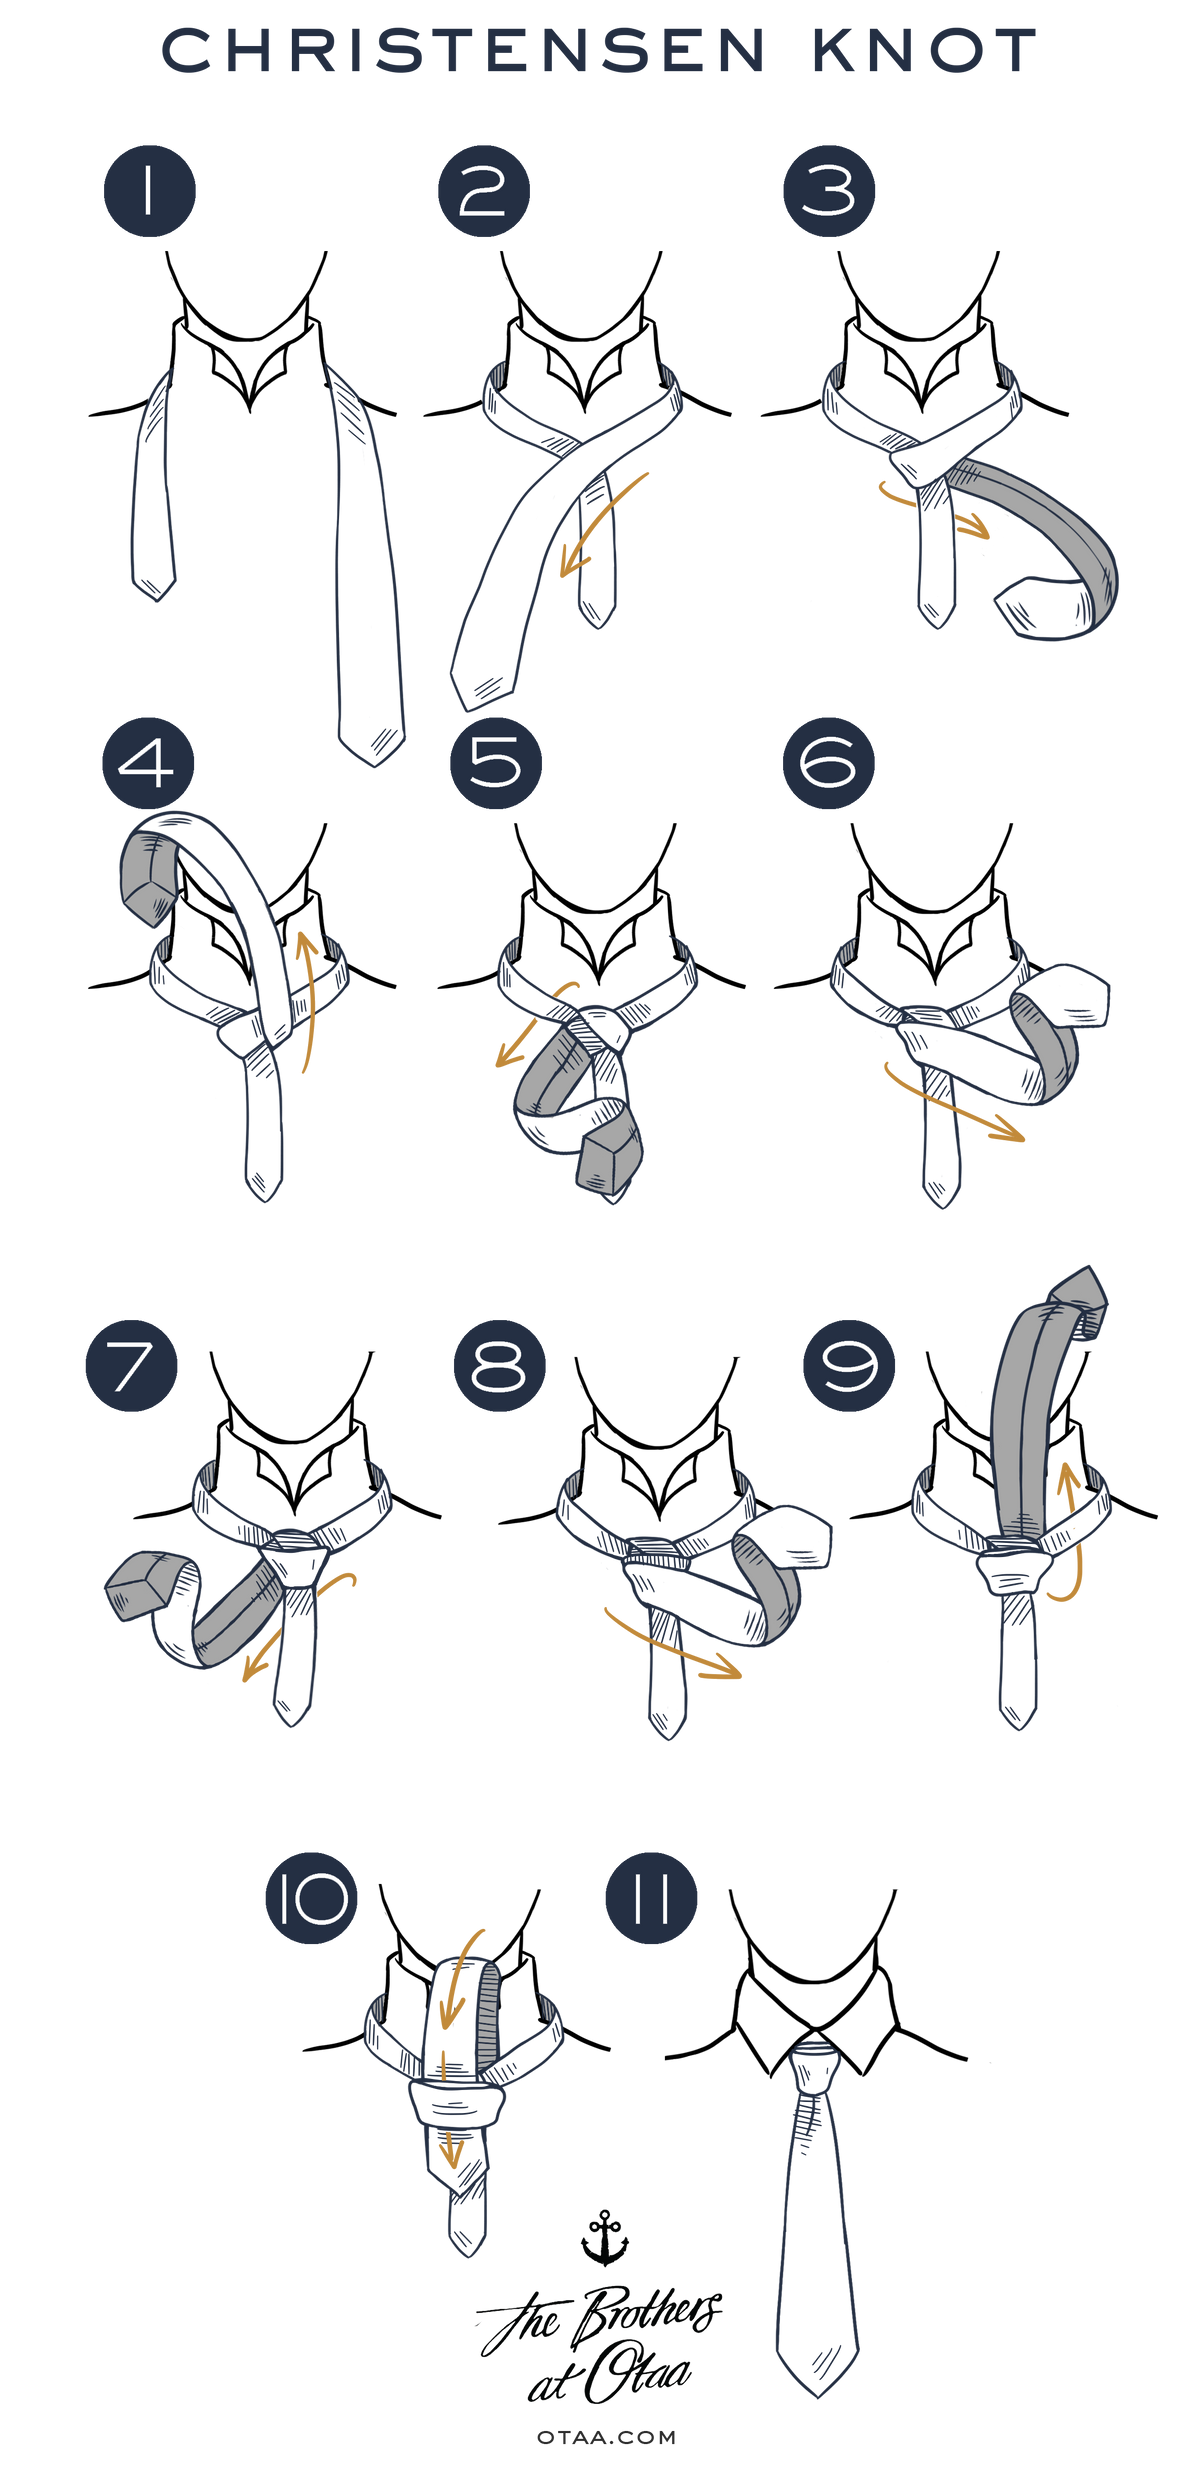
The Cross Knot, or Christensen Knot, is named after a tie maker named Christensen who appreciated the subtle art of elegance. It features two overlapped layers of fabric at the top of your tie that forms into a delicate "X" shape. The Cross Knot is still largely uncommon to observe on the street but it makes the perfect hat-trick for formal occasions. It will add a masterful addition to your formal repertoire and will stop people in their tracks at every social occasion you attend! Now have a go at tying it and make Mr. Christensen proud.
The
Cross Knot tying steps


- Place the tie around your neck with the wide end on the right and the skinny end on the left. Position the wide end lower than the skinny end.
- Cross the wide end over the skinny end towards the left.
- Cross the wide end underneath the skinny end towards the right.
- Fold it up through the neck loop.
- Pass it down to the left side.
- Place two fingers in front of the knot and then cross the wide end over your fingers towards the right.
- Cross it underneath the knot towards the left.
- Cross it over the knot towards the right. Keep your fingers in place.
- Fold it up through the neck loop from underneath.
- Pass it down through the loop you've created in the knot, where your fingers are.
- Pull down on the wide end to tighten the knot and then slide the knot up towards your neck.


